Six Easy Ways To Make A Heart In Blender
Table of Contents
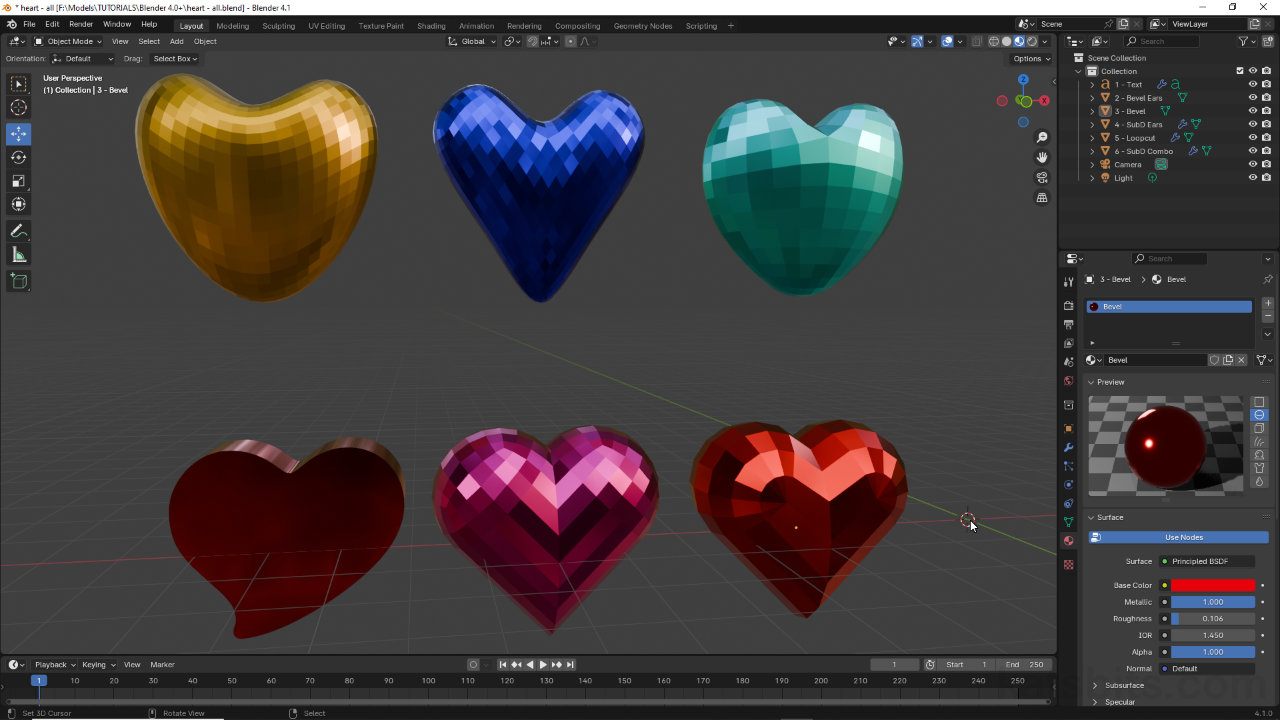
Description
In this exercise suitable for beginners we take a look at six different ways to easily make a heart in Blender 3D. First we use text, then two ‘classic’ approaches, before using more seemingly complex structure that allow for much greater flexibility for mesh editing after-the-fact. A simple ‘metallic’ material is applied throughout.
Duration: total c. 30 mins (00:30:00).
Info: 1080p.
Suitability: Beginner+.
Source: KatsBits – Hearts (c. 200 KB | *.blend).
Product ID: n/a.
See “Blender Basics” for more on using Blender 3D.
Design note: when making heart meshes in Blender 3D keep the following in mind;
Text
When using Convert to generate an editable mesh from a Text object (Object » Convert » Mesh), the resulting mesh may consist of a significant number of long, thin triangles that tend to cause problems for Bevel (manually applied or modifier), this is especially so for relatively complex curved shapes where triangle alignment and distribution becomes inconsistent and inefficient in order for curves to be adequately represented.
Aside: support for a particular text symbol or font style will be confirmed by the fact that the heart will be visible. If a given style or font is not support, the default ‘unknown’ character will be shown, i.e..
Using Convert to generate an editable mesh results in a lot of triangles regardless of mesh resolution that can cause issues when wanting to modify the mesh further.Text Properties
An alternative approach to making a text-based heart in Blender is to use the options available to Text objects generally, in particular the Geometry and Bevel options found in (Text) Object Data Properties [1]. Here, with Text object selected, it can be given thickness by setting an appropriate Extrude value under Geometry [2], and edge or corners rounded using the Depth and Resolution values under Bevel [3]. Once the desired shape has been made it can then be converted to a mesh object as normal for additional editing not otherwise available to Text objects – Object » Convert » Mesh.
Aside: although Object Data Properties use may yield better results compared to editing a converted mesh, doing so may introduce its own set of issues, particularly where sharp corners or edges are used to describe shapes and forms as these tend to collapse or fold in on themselves.
To avoid this use the options available in Object Data Properties [1] where Text can be thickened using Extrude [2] and rounded using Bevel [3].Add Mesh
The default scene includes a cube primitive that can be used right away. However, in instances where more objects are needed meshes can be dropped in to place clicking the Add [4] then Mesh, Cube [5] – Add » Mesh » Cube. An cube will appear ready for shaping and editing.
Aside: new objects dropped in after-the-fact do not have materials so at least one will need to be assigned.
Dropping a new object into the scene to create a new heart from the Add [4] menu and the Cube [5] option.Duplicate Objects
Alternatively, available objects can be copied using Duplicate. To create an instance independent of an original, with object select, in the Object menu click Duplicate Objects – Object » Duplicate Objects (Shift + D). And exact copy will appear at the following the mouse cursor. Press Esc to release, ready for manipulation or editing. To create a ‘mirrored’ copy, one that updates when the source is altered, in the Object menu click Duplicate Linked – Object » Duplicate Linked (Alt + D).
To make a copy of an existing object from the Object menu [6] use Duplicate [7], either Duplicate Objects for independently editable instance, or Duplicate Linked for meshes that automatically update when the source is changed.Shade Flat/Shade Smooth
By default mesh and Text objects tend to be flat shaded, that is, each face is treated as individual unit within a wider area, the hard delineation between them then giving the impression of faceting (especially when a metallic material is used). In this context, making simple hearts, the shape and size of individual facets is determined by the way a mesh has been made and the density of the structure this creates – the more rounded the shape, the smaller individual faces will be, so too the appearance of faceting.
Aside: using ‘bevel’ to create a heart shape is not as flexible as subdivision surface because once the shape itself is made the resulting structure is essentially fixed in place, whereas subdivision surface, being dynamic, means faceting can be increased or decreased on demand (until the modifier is applied).To essentially remove the appearance of faceting meshes will need to be smoothed. This treats each face as though they’re members of a larger group, the delineation between each essentially ignored so surfaces appear contiguous/continuous. To do this, with object selected, from the Object menu click Shade Smooth – Object » Shade Smooth. Any facets that were visible will be disappear, the larger surface appearing uniformly shaded.
The difference between a facetted mesh (bottom) versus smoothed (top). While some hearts are easier to make they may not be easier to modify, especially where faceting is needed.
![[descriptive alt image text here]](https://www.katsbits.com/images/tutorials/hearts/text-triangulation.jpg)


Timestamps
Times are approximate;
– 00:00 : #1 Text Heart
– 03:30 : #2 Rounded Extrusions
– 12:00 : #3 Bevelled Extrusions
– 17:00 : #4 Subdivision Extrusions
– 21:00 : #5 Loop Cut & Subdivision
– 24:30 : #6 Loop Cut + Extrusion
