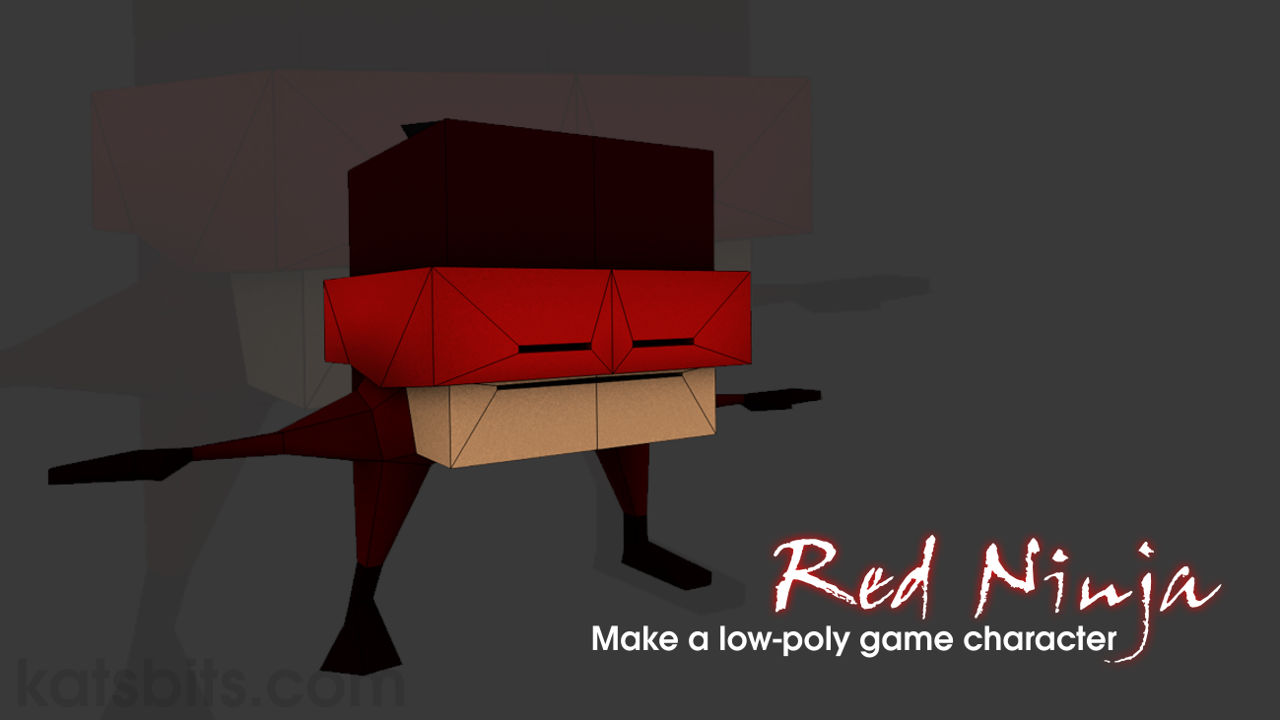
Red Ninja Cubie™ #5 – Making of Video
Supplimentary to parts 1 – 4, part 5 shows the process of meshing the Red Ninja character from the initial default Scene Cube object (a block) to finised, UV unwrapped and textured mesh ready for rigging (Armature assignment) and animation (Action Editor).
Download: Red Ninja™ source file (c. 900 KB | *.blend, *.tga).
Design note: the video shows the process as a series of linear steps, much of the broader explaination being left for the written materials – parts 1 through 4, where making the character is explained in greater detail.
Editing the Mesh
Part 1: editing the character starting with the default Scene Cube object using basic tools and functions. Once the mesh is complete Materials are assigned. Its then UV unwrapped and mapped before being used to bake a texture that’s reassigned to the mesh completing the character overall appearance as a Cubie™.
Duration : c. 53 minutes.
- Meshing: 0:00 – 27:00.
- Materials: 27:00 – 40:00.
- UV Unwarapping: 40:00 – 42:00.
- Textures: 42:00 – 49:00.
- Texture Baking: 49:00 – 52:00.
- Reload Image: 51:00 – 53:00 (end).
Part I: modeling the mesh, materials, textures and UV unwrapping the character
Part II: adding an Armature to ‘rig’ the character made and textured in Part I above
