Skybox Rendering in Blender 2.49
There aren’t that many (if any) decent or free applications or software on the Internet that can render out or produce decent quality images for use as a Skybox or environment map for games and interactive media.
This resource aims to remedy that by providing source files and information that will allow anyone to freely render Skyboxes using the power of a free 3D application called Blender 3D.
Download: KatsBits – Skybox Template (Blender 2.4(x) (c. 1 MB | *.blend, *.tga)
Resources
– Skybox Cycles Render
– Skybox Blender Internal
– BlenderWiki on skyboxes
– GIMP graphics program
Read through the Blender Wiki tutorial on rendering Skyboxes before proceeding or using these files
How to use *.blend Skybox template
What these files will allow you to do is render out a custom Skybox with a minimum of fuss, both on and off the Internet. In essence all that needs to be done is a simple find and replace of the default TGA assets that are actually used to render out the Skybox – if you keep the file names the same as well as the image sizes and locations they should appear the next time you open Blender or you ‘Reload‘ then from the UV/Image Editor window (image -> image reload").

The contents of the Skybox rendering file; a sphere broken into several sub component each with a different texture applied
You can also add 3D objects to the inside the boundary of the sphere for those objects to then be rendered onto the skybox texture set as part of the over all Skybox. Although this process is a simple replacement of assets you need to pay particular attention to this section of the wiki tutorial; rendering out the skybox itself, because Blender is rendering the images for internal use and holding them in memory until you save them out to a format of choice.
What’s in the Blender Skybox render template file?
Aside from the sphere shown in the above image, the following files can be found in the package; it’s these that need to be replaced – like for like – so that you can render out your own custom skybox image with as little fuss as possible. Although the included files are limited to 512 pixel maximum width that is by no means the limit; so long as the images used have the same proportions as those below they will work without noticeable problems or issue (main sky texture="2×1", sky top="1×1", ground bottom="1×1" and horizon="4×1" ratio width to height).
Design note: the images below are ‘standard’ game textures, that is they are not fisheye, panoramic or extended images as used in the Wiki tutorial above, this facilitates easy use of the renderer to anyone that has access to normal digital images (scanned photos or digital camera transfers).
The files used to render out this basic Skybox using Blender are as follows;

The Skybox body used to cover the main area of the skybox mesh

The ground or bottom and top surfaces to render out the Skybox Horizon and correct ‘warping’ from the upper UVW mapping. Note : black area on image left shows masked area and it not exported for use.

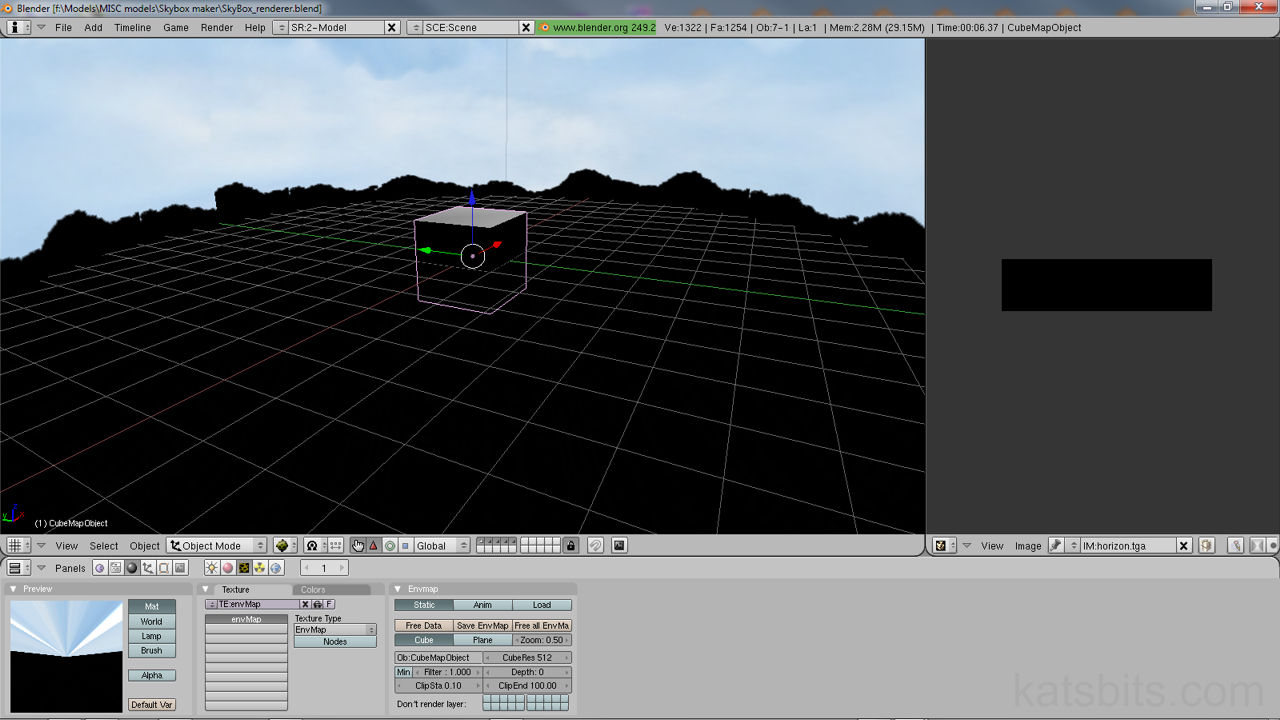
The Horizon plane – a simple silhouette image that wraps around the entire mesh.
What should the resulting Skybox render look like?
Once the rendered image is saved out to your computer (follow the last stage of the Wiki tutorial here), on opening it up into a photo editor you should see something similar to the image below; i.e. a flat rendered image composed of 6 individual ‘units’ side by side in the same file. The order is (from left to right, top to bottom, starting top-left) "left, back, right", and "bottom, top, front". For the purposes of this template file the skybox is a simple silhouette horizon against a blue sky but editing or providing your own images means being able to render anything out to the skybox texture image.

The finished Skybox render from Blender 3D
Using the rendered skybox outside of Blender 3D
Because the skybox is rendered using Blender it’s layout and organisation is set up to take advantage of is being used in Blender itself. This means for use with other game engines and interactive media it’ll most likely be necessary to cut the flat up in to individual component parts (depending on what you’re going to be using the skybox for), and saving each ’tile’ – using the correct naming convention to work with whatever 3D media you’re working with – to your project folder.
Design note: be sure to note which direction is which as the order (mentioned above) in which they are rendered won’t necessarily correspond to or be the same as used for other 3D media, in other words, it’s usual that one of more axis may be flipped so that images display in game back-to-front or upside-down.
Skybox rendering hints & tips
When rendering out a skybox keep these hints and tips in mind;
- The skybox can be further edited in your photo editor to tidy up any discrepancies or visual errors you may have inadvertently included, but when doing so, be mind full not to ‘damage’ the edges of each ’tile’ else it will cause visible mismatches in your 3D media (keep in mind that skyboxes are often ‘magnified’ so small flaws may become large ones inside your 3D environment)
- If the resulting skybox images need to be smaller it’s best to, where ever possible, re-render the images out to the desired size.
- Related to the above, it you re-size the skybox image in your photo editor make sure that you leave anti-aliasing OFF when doing so; leaving it on causes pixel bleeding and blurring along the edges of each tile which cause alignment problems when used ‘as is’.

