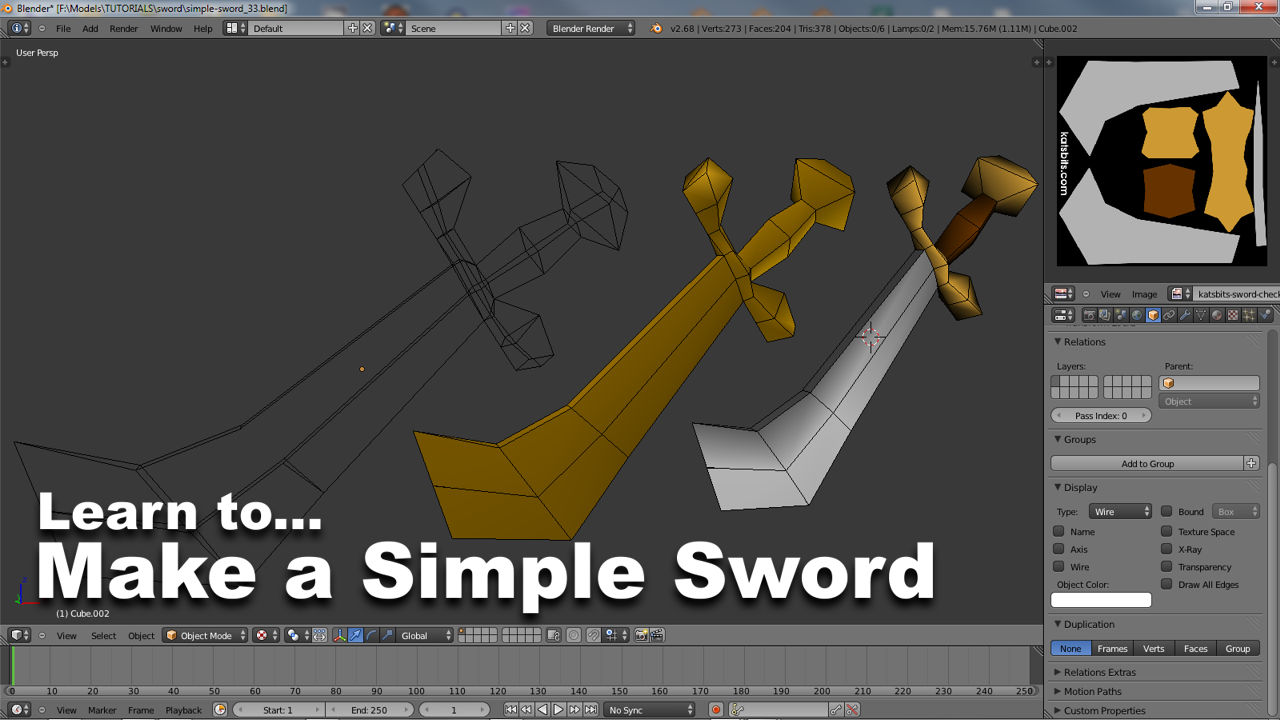
Sword #5 – UVW Unwrapping the Sword
In the previous chapters we set up a concept sketch as a background image, using it as a guide to make a simple low poly sword model to which we then applied mesh smoothing. We also looked at editing a materials texture and images assignments. In the following we’ll learn about UVW unwrapping and what that means in relation to how an object appears to the viewer.
It’s recommended that the reader has gone through the previous chapters and/or have done the first Blender Basics tutorial on building a simple chair, or at least be familiar with Blender before reading the following information.
UVW Unwrapping & UVW maps
Continuing on from editing a material. Once that is set up the next step is to "unwrap" the model so the texture image assigned to it can "map" around the object properly, "unwrapping" or "mapping" is the process through which that is done. This is in essence what a UVW is and what it does.
If you imagine covering a box of chocolates in decorative wrapping paper, the actual process of wrapping the box up equates to UVW "mapping" or "unwrapping", working out how the paper should be properly ‘wrapped’ around the box of chocolates. The actual area or amount of wrapping paper used to cover the box is the UVW "map". And the pattern on the paper would be the "texture" assigned the ‘map’ (paper). All 3D objects undergo a similar process when being ‘unwrapped’, our sword model being no exception, carried out using Blenders UVW tools, specifically "Mark Seam" and the "UV/Image Editor".
Design note: UVW editing uses a number of the same core tools as mesh editing. General selection can be done with "RMB" (individual), "Shift+RMB" (multi-select), "Alt+RMB" (loop select), "B" (border) and "C" (circle). Moving, rotating and scaling with "G" (move/grab), "R" (rotate) and "S" (scale). And "X", "Y" locking translation axis.
UV/Image Editor
The "UV/Image Editor" is primarily where most of the work making and editing UVW maps is carried out. However, it’s not visible by default so we need to switch one of the views. As the "OOPS" view top right isn’t being used click the "Editor Type" button on the left of the menu header (shown below) and select "UV/Image Editor" from the list. The view will change to show a greyscale ‘grid’ (shown below) which may need to be resized, if so, move the mouse over the border between the "UV/Image Editor" and the "Properties" section below – a double headed white arrow will appear – and LMB click drag to resize; the view doesn’t need to be big as it’s only being used here to ‘monitor’ progress in these early stages of unwrapping the meshes UVW’s.

Switching the "OOPS Editor" view to the "UV/Image Editor" [see *.blend "28c"]
Assigning an Image to Default UVW
Before we edit the UVW map we need to assign an image to it so we can see what we’re doing. Although the previously applied "Material" has an "Image" associated with its "Texture" slot, it is not automatically applied to the mesh by virtue of its presence in the material, instead it has to be manually assigned to the UVW’s.
Design note: be mindful that because of the way images have to be assigned to UVW maps, it’s possible to assign a completely different image asset to an object than the one actually assigned or associated with a specific "Material".
If you’re in "Object" mode RMB click to select the sword then press "Tab" to switch to "Edit" mode. Once there, or if you were already in it, press "A" to "Select All", this makes sure that when the image is assigned to the UVW map it gets applied to everything that’s actively selected. Next in the "UV/Image Editor" window click the small ‘image‘ icon to the left of "+ New", the "Browse Image to be linked" button, a drop-down menu appears listing every image Blender current references, for us that’s the original background sketch – "origin-sword-doodle-sletch_sml.jpg" and the image we added to the material in the previous chapter, "katsbits-sword-checker.tga". Select the checker to assign it to the UVW map.

Assigning the previously loaded texture image to the swords UVW
It will then displayed in the UV/Image Editor underneath the white UVW triangles (show top-right below) but not on the mesh itself. To see it we need to switch "Viewport Shading" from "Solid" (which we’re currently in) to "Textured". To do this, move the mouse back over the "3D View" and press "Alt+Z" to toggle between "Solid" and "Textured" modes, or alternatively click the "Viewport Shading" button in the menu header and select "Textured" from the list of options. In both instances the texture will immediately display on the mesh (shown below).

Viewing the assigned texture by switching the "Textured" viewport shading. Note the distorted placement of the image whilst using the default UVW map the original cube model had [see *.blend "28d"]
Addendum: Changes to Viewport Shading
Depending on the version of Blender being used to work through this tutorial, it may be noted that when switching to "Texture" mode (in later versions of Blender that’s "Texture" not "Textured" mode), the mesh displays as being quite dark as a result of what is now default behaviour, if the Scene contains a light source ("Lamp") it will now affects any Objects within range. Previously, Blender typically ‘ignored’ the 3DViews Scene lighting so meshes were often displayed ‘shadeless‘ or ‘flat-lit‘ as shown above. This is no longer the default behaviour (as shown below). There are one or two ways to work around this ‘problem’ (the "problem" being that due to the nature of "Object shading" it can be difficult to see a mesh clearly); 1) add more lights to the Scene, or 2) delete/(re)move them.

In later versions of Blender, when switching to "Texture" mode the mesh may appear dark or poorly lit, this is due to the way lights now directly affect the Scene and Objects contained therein
Generally speaking then, how well lit an Object is depends on; 1) the number of lights contained in the Scene, and 2) how ‘bright’ they. This is adjusted by changing the "Energy:" and "Distance:" values attributed to each item (in "Object Data" Properties). So, if lights are to remain useful this means employing fewer with high values, or more with lower. As a general-rule-of-thumb, if the mesh needs to be ‘well lit’ the former option is preferable; evenly lit, the latter.
Shown below for example, the default light, still in its original location, is not adequate, so it is duplicated, which in turn is moved to the other side of the mesh. In this instance combined they provide more than enough illumination but extra lights can be placed using the "Add" menu or again though "Duplicate" – for the former, after exiting Edit mode, "Tab", press "Shift+A" to access the "Add" menu, selecting "Lamp » Point" from the list to place the extra objects needed. Once done, press "G" or LMB+hold+drag the appropriate 3D widget handle/s to drag/move the new item into position, LMB clicking to set in place.
Design note: objects will appear at the 3D Cursors location so this may need to be snapped to another Object to prevent wayward placement – RMB select an object or element then use "Shift+S" to access the "Snap" menu, select "Cursor to Selected" and then add the new item.
Or to copy a light, again after exiting "Edit" mode, RMB select the item and then use "Shift+D" to "Duplicate"; the light will be ‘active selected’ upon creation (it moves with the mouse) so simply move the mouse into position and LMB click to set in place.
Design note: the original object being duplicated determines the initial location at which new objects appear, which naturally changes depending on the object or element selected. If ‘active selection’ is a little awkward to use, immediately after duplication click the RMB to release the new object (which resets back to point of origin) and then press "G", or use the widget handles, to position the item before setting its new position, again clicking LMB.

Using lights, Objects and the Scene containing them are lit based on the ‘brightness’ of the illumination, typically one won’t be enough

Adding a second light source, either through "Add" or "Duplicate", the Scene and Objects are better lit [see *.blend "28d(266)"]
The alternative to adding extra lights, option "2" mentioned in the initial paragraph of this section, is to simply delete or, using Blender "Layers" feature, move them out of the way, forcing the Scene to display flat-lit (because there would no longer be any lights in the Scene or on the same Layer as the mesh). To delete lights, simply RMB select the errant Object and press the "Del" key. Immediately upon doing this the Scene and its contents will display flat-lit (‘shadeless’). To keep the light (for later user perhaps) but move it out of the way using Layers, RMB select the object and then press "M", a small panel will appear displaying a series of buttons. LMB click one to select it (the light will be ‘moved’ to whichever Layer button is pressed). Immediately upon doing this the light will disappear from the Scene and the mesh will become flat lit.

Using "Move to Layer", lights can be ‘moved’ to another layer which means it will no longer affect the mesh

Once the light has been moved to another Layer, the Scene and it’s contents are forced to display ‘shadeless’, i.e. flat-lit, because the light no longer influences the Scenes illumination[see *.blend "28d(266B)"]
To re-enable the lights influence over the Scene, in "Object" Properties, find the "Relations" sub-section and then "Shift+LMB" select each "Layers:" button for which the light should have an effect.

Although the light has been moved, using "Relations:"[1] the light can be set to influence the Scene by changing, adding/removing, Layers over which it should have influence – when doing this the "Layers" panel[2] in the 3DView header will update to show which layers the object is associated with
With these changes in mind, if using a later version of Blender to work through this tutorial, for now, go ahead and either delete the light, or move it to another Layer as described above – this will then mean the Scenes appearance and Object illumination therein is consistent with the remainder of the tutorial.
UVW Unwrapping Principle
With the texture image now visible on the mesh we can see that it’s noticeably distorted because the UVW map is not yet evenly distributed over the model, some areas are compressed whilst other are stretched – this distortion, or the discovery therein, is a reason why meshes ideally should be initially textured using a ‘checker’ as it makes these types of issues easier to see and fix. This brings us neatly to a discussion about some of the principles behind UVW mapping.
First, the general idea is to try and unwrap objects so their UVW’s fall within the boundaries of a mapped texture, indicated in the UV/Image Editor by a grey grid or the texture image itself (see images above). This is commonly referred to as the "texture space", "texture boundaries" or "UV boundaries". Second, the eventual layout of the UVW map is determined by the relationships between UVW segments, or "islands" as they’re more often called. In other words, certain types of object may not present ‘logical’ or ‘smart’ usage of the aforementioned texture space, often requiring re-mapping and re-positioning. Third, each UVW island is relative to it’s neighbours and something called "texture density" (or "pixel density") that is, the amount of texture space being used per UVW map – the ratio is typically 1:1 or 2:1 so that everything looks approximately the same. Beyond that, the differences in "pixelation" may be significant and noticeable.
Design note: there are exceptions to the above however, namely very large objects and/or ’tiled’ or ‘repeat use’ items such as building sections – walls, floors and so on. Terrain also falls outside of the scope of the above.
With the above in mind, shown below is what this means in practice; the sword object is currently poorly textured because it’s still using the default UVW map assigned the original cube. We need to assess the object and make (mental) notes on where it can be best broken down and/or split, beforehand, into a series of reasonably logical areas, each of which should form a distinct ‘island’ within the overall UVW map.

Looking at the sword to see how the UVW map can be broken down into smaller zones to make unwrapping easier and more efficient – blade, guard, handle and pommel areas
Mark Seam & UVW Unwrapping
UVW unwrapping itself is typically a two-part process that’s repeated a number of times until the best fit is found for the UVW map within the allotted texture space. Although "Seam" marking to define splits in the UVW’s which we then "Unwrap" to produce a finished layout is repeatable, it typically only needs to be done twice; first pass to ‘block-out’ the sections, second pass to refine the results.
Taking the first pass to task. We need to define a series of areas that correspond to the major features and/or structures present in the mesh, for the tutorial sword model that would be the ‘blade‘, ‘guard‘, ‘handle‘ and ‘pommel‘ sections. Press the "Tab" key to toggle "Edit" mode if not already in it, then "Ctrl+Tab" to make sure we’re using "Edge" selection. With a combination of "Alt+RMB" and/or "Shift+RMB" select the edge-loops corresponding to the ‘blade <-> guard‘, ‘guard <-> handle‘ and ‘handle <-> pommel‘ connections of the mesh (shown below). Press "Ctrl+E" to open the "Edges" menu and select "Mark Seam" to flag the selected elements as UVW seams ("Mesh » Edges » Mark Seam"). The edges will turn ‘red’ indicating they’ve been marked.
Design note: currently marking both ‘seams’ (for UVW mapping) and ‘sharp’ (for mesh smoothing) highlights edges with the same ‘red’ tinted indicator.

In Edit mode selecting the edge loops that will split the mesh into a number of sub-elements that make mapping the UVW’s easier [see *.blend "29"]

Using "Ctrl+E", selecting "Mark Seam" to ‘flag’ edges for splitting
With the seams marked and ready for the initial UVW unwrapping pass, press "U" to open the "UV Mapping" menu and select "Unwrap" from the list of options. This will ‘unwrap’ the mesh and in the UV/Image Editor the UVW’s will reorganise into a number of separate sections, each corresponding to one of the blocks we marked for splitting – the ‘blade’, ‘guard’, ‘handle’ and ‘pommel’. At the moment however, the results don’t resemble the sword, they’re distorted due to Blender trying to unwrap UVW’s that are not yet set up to properly allow the unwrap process to fully ‘flatten’ out the map. To fix this a few more seams need to be added, we’ll do this next.

Press "U" and select "Unwrap" to initiate the initial pass at unwrapping the UVW’s once the appropriate edges have been marked as seam splits

This results in the an initial UVW unwrap showing four separate blocks. However, they’re not fully optimised/correctly marked up for proper unwrapping, hence the distorted appearance of the UVW [see *.blend "29b"]
Flat UVW Maps
Taking the second pass mentioned above to task and refining the UVW map, this means selecting additional edges and marking them as seams before unwrapping the mesh again. As before use a combination of "Alt+RMB" and "Shift+RMB" to loop and individually select edges running along the ‘front’ of the blade, right up to the previously marked loop at the blade/guard joint (first image below). Then select the edges running down the underside of the handle guard, fanning this selection out to the two underside edges at each end of the counter-weights (second image below). Finally select the edges along one side of the handle area and fan that selection out up each of the underside edges of the pommel (third image below).

Marking additional seams to properly ‘flatten’ the UVW map. Selecting edges along the ‘front’ edge of the blade (this corresponds to the sharp edge of the sword)… [see *.blend "29c"]

… then select the edges on the underside of the handle guard. Note the underside is used to place the split because it’s more likely not to be seen by the player or character holding the object

Finally select the edges along one side of the ‘handle’ and fan out on the underside of the pommel, this makes sure these round shapes unwraps flat
With the new edges selected press "Ctrl+E" again and from the "Edges" menu select "Mark Seam" as before ("Mesh » Edges » Mark Seam"). The edges will turn red indicating they’re been marked and are ready for a second unwrapping (see below).

Overview of the selected edges (top) and those same edges marked with a "seam" ready to be unwrapped again (as mentioned above, note that both edges marked as ‘seams’ and those marked as ‘sharp’ show the same default highlighting in Blender [see *.blend "29d & 29e"]
With the new edges marked press "A" to "Select All" (remember this may need to be pressed twice, once to deselect current selections then again to reselect everything), then press "U" to open the "UV Mapping" menu, select "Unwrap" from the list to unwrap the mesh again. On this second pass the new seam markings cause the UVW map to flattening itself out more efficiently than before resulting in clearly defined ‘islands’ appearing in the UV/Image Editor and a much better texture distribution over the model in the 3D View – remember to press "Alt+Z" to switch to "Textured" view if you’re in "Wire" or other ‘view’ mode in order to see the textured model (may need to be pressed twice).

The image assigned to the UVW map shows much better distribution over the model than previously because the seam markings help to strategically split the map and allow it to properly flatten itself into a usable ‘map’ [see *.blend "29f"]
Fixing UVW Map Distortions
There is still some distortion in the textures mapping over the blade as it tracks around the slight curve which need to be fixed. Generally, as is the case here, this happens when objects contain shapes and/or contours that, as UVW’s, can’t be fully flattened causing Blender to then distort the mapping to fit the mesh. To prevent this from happening it often means making another pass at seam marking the object to strategically split the offending sections into additional UVW islands.

Marking additional seams to split larger odd shaped UVW islands into smaller more manageable elements that then map more efficiently [see *.blend "29g"]
Shown above then are these additional seams marked along the back edge of the blade, this isolates the two sides plains from the back, creating three separate islands in the UVW map when unwrapped. Using a combination of "Alt+RMB" and/or "Shift+RMB" select the edges running down the back of the blade, press "Ctrl+E" and select "Mark Seam". Once done press "U" and select "Unwrap" to rebuild the UVW map using the new seams, resulting in something similar to the image below where the texture is properly mapped without obvious distortions over the blade. With this done the sword is basically UVW unwrapped, however, it needs to be optimised so each element makes the best use of available space on the texture.

The resulting split UVW map sections, note texture placement on the blade area no longer distorts due to the way it was previously unwrapped [see *.blend "29h"]
Preparing to Edit the UVW Layout
When unwrapping objects the way we’re doing it in this tutorial, the resulting layout rarely uses the available texture space as efficiently as possible without requiring some degree of direct editing in the UV/Image Editor. Typically this just means resizing and repositioning elements so they fit better as is the case here. To better edit the UVW map we need to swap the views around so we can properly focus on the UV editor whilst previewing the edits in the 3D view at the same time.
To swap the windows around, in both view headers click the "Editor Type" button and select "UV/Image Editor" to swap "3D View" view, and "3D View" to swap the "UV/Image Editor". If done correctly the main window will display the texture and the smaller window top-right, the sword – which will likely appear in "Wire" mode, if so mouse over the view and press "Alt+Z" to switch to "Textured" mode. It may also need to be repositioned so MMB, "Shift+MMB" and/or "Ctrl+MMB" the scene so the sword model can be seen clearly.
Before we begin editing the UVW map we need to expand on something mentioned above; "texture density". When editing the UVW map of an object that’s broken down into sections, each of those individual sections ideally needs to be proportional to the rest; if a larger element occupies the full width of the UVW/Texture, a smaller one typically requires much less UVW and texture space. In practice this generally means UVW elements should be edited as groups where-ever possible, rather than individually; if the size of one needs to be changed, others typically need altering so the size/ratio relationship is kept the same between all.

Switching Editor views so UVW map editing can be done with greater ease [see *.blend "30"]
Editing UVW Maps
The first step then is to guesstimate the larger masses relative to the available texture space. For this all we need do is simply select everything and resize the UVW’s so that the largest objects, the blade sections, occupy as much space as possible. In the Editor, press "A" to select all, then "S" to "Scale" the UVW map so the blade sections are approximately the width of the texture; holding "Ctrl" whilst doing this to snap the up-scale (see below).

Select everything and "Scale" the UVW map so the largest elements fits approximately within the available texture bounds. Note also most movement and manipulation tools work they same way in UVW Edit mode as they do when editing the mesh in 3D view [see *.blend "30a"]
Deselect everything ("A"), then "Border" ("B") or "Circle" ("C") select each UVW island in turn and move ("G") them into the grey ‘work area’ – leave the two blade components[1, 2] where they are for now. Once the other parts have been moved we can then select, position and rotate ("R") the two blades halves so the longer edge of each is facing outwards from the texture (shown below).

Moving the various elements out of the way so as to reposition the two main islands. Each element represents part of the model 1) blade, 2) blade, 3) guard, 4) pommel, 5) handle and 6) back side of blade [see *.blend "30b"]
Then in similar fashion, select, move and/or rotate in turn the remaining UVW islands so they fit within the remain space. So reorient vertically the long thin section that corresponds to the back side of the blade[6] and place that down one side of the texture; place the ‘handle’ section[3] to the inside of that, and the remaining ‘pommel’[4] and ‘handle’[5] sections to the inside of that so the final UVW layout we end up with is reasonably well organised and tidy. In doing this we’ve fully unwrapped the swords UVW’s and produced our finished UVW ‘map’.

Final layout of the UVW map with the various island elements placed more efficiently and using a greater amount of UV space than was generated by default 1) blade, 2) blade, 3) guard, 4) pommel, 5) handle and 6) back side of blade [see *.blend "30c"]
Exporting/Saving UVW Maps
Aside from ensuring the texture is applied properly over a model, the UVW map itself can be exported and used as a template from or onto which the final diffuse texture is painted (what you see in-game). From the "UV/Image Editor" menu header click "UV’s" and select "Export UV Layout" from the list ("UV’s » Export UV Layout"), this will open the "File Browser". From here browse to a location where the file[3] is to be saved (if not saving in current location) and in the "Export UV Layout" section set the format (*.png) from the drop-down list and select "All UV’s". If necessary change the file name[1] (LMB click and type – note the name defaults to the same name used by the *.blend file itself) and then click the "Export UV Layout" button top-right. Blender will then export the UVW’s out as an image, saved to the location of choice (see below).

Saving the UVW map layout by using "Export UV Layout" so it can be used to create a proper texture for the sword model

Choose the file name[1], the location[3] to save the file (if not using the default working directory) and then click "Export UV Layout". Make sure to select the format the image should be saved as, *.png in this instance – currently there are few options to save to so make sure your image editor support the available formats

The UVW map will be saved as an alpha-masked object (highlighted on the left above as a darker orange) which acts as a template over which the proper texture can be made or painted
UVW’s, Painting Textures & Re-Importing
With the UVW map now saved, open the image into your photo-editing application and using the wireframe as a guide, paint something over the corresponding areas of the map – for the sake of simplicity the texture used in this tutorial has just two or three flat colours painted over it. Once the relevant editing and/or painting has been done the newly updated image can then be imported back into Blender for use as a ‘proper’ texture.
Due to the number of image editing applications available and the numerous ways in which textures can be painted, it’s too broad a subject to be covered in this tutorial.

A simple texture painted over the previously exported UVW map which will be imported/loaded back into Blender to be used as the ‘proper’ texture image applied to the sword model
To re-import the new texture first make sure it’s saved to an appropriate format (*.tga, *.bmp, *.jpg etc), then note its file/directory location. Back in Blender click the "Texture" properties button on the right and scroll down to the "Image" sub-section. Here click the "File" icon[1] to the right of the text input field to open the "File Browser", browse to and select the updated image – make sure "Relative Path" is checked, and then click "Accept". The original checker image will automatically update to show the new version; if we switch the views back to the way they were originally – click the "Editor Type" button and select "3D View" to swap the "UV/Image Editor", and "UV/Image Editor" to swap the "3D View" – we’ll get a better sense of how this final version looks on the mesh (shown below).

Click the "File" icon[1] in "Texture" properties to open the "File Browser"…

… then select the image[1] to be used (browse to it’s location if necessary[2]) and click "Accept"[4] – make sure "Relative Path"[3] is active.

The image originally associated with the material will be automatically updated and replaced with the newly imported image [see *.blend "31"]

Switch views – select "3D View" from the "Editor Type" list to swap the UV/Image Editor for the 3D View and visa-versa for the view top-right. The basic texture assigned to the sword model (in edit mode) [see *.blend "31b"]

Replaced texture in ‘Object’ mode [see *.blend "31c"]
Next we’ll learn about some modelling ‘extras’, features and tools that can be useful for 3D modeling.

